In short
The easiest puppets to make with kids are a paper bag puppet and a stick puppet: a two-year-old can draw the face and glue on the hair, and a grown-up does the cutting. From four, most children can cut along a line and round a circle, so finger puppets, folded paper puppets, sock puppets and shadow puppets are theirs to make. By six or seven, when children can cut out more complicated shapes, they can build jointed paper puppets with moving arms and a jumping jack that kicks when you pull the string. Below are 12 puppets sorted by those ages, with what you need and how to make each one, then three ways to build a stage and a list of puppet show ideas.
Search for how to make puppets and most of page one is videos. The written pages that do come up each show a single puppet. Few give an age, and none of the ones we read says what to keep off a toddler's puppet.
So this page puts a dozen puppets in one place, from a lunch bag with a flapping mouth to a jointed knight held together with brass fasteners, and sorts them by what children can usually do with scissors at each age. The ages come from the scissor-skill sequence occupational therapists use, set out in the table below. Treat them as a starting point. A careful three-year-old with a grown-up beside them can make a sock puppet, and a seven-year-old who wants a quick win can still make the paper bag one in ten minutes.
What can a child make at each age?
The puppet a child can make mostly comes down to scissors. The American Occupational Therapy Association's children and youth section sets out the usual order in its scissor skills sheet, drawn from Hilton and Kramer (2020): snipping at 2, cutting across a 6-inch strip of paper at 2.5, cutting on a line at 3 to 3.5, cutting out a circle at 3.5 to 4, a square at 4.5 to 5, and a variety of shapes at 6 to 7. Lurie Children's Hospital gives a similar picture: snips at 2 to 3, a circle at 3 to 4, a square at 5 to 6.
| Age | What most children can cut | Puppets to try |
|---|---|---|
| 2 and 3 | Snips, then a cut across a strip of paper | Paper bag, paper plate, stick puppet from a drawing, wooden spoon (a grown-up cuts) |
| 4 and 5 | A straight line, then a circle, then a square | Finger puppets, folded paper talking puppet, sock puppet, shadow puppets |
| 6 and 7 | Most shapes, including small parts with tabs | Box mouth puppet, jointed paper puppet, jumping jack, felt hand puppet |
Scissor ages from AOTA's children and youth section (Hilton and Kramer, 2020) and Lurie Children's Hospital. Every child is different, so use the age as a guide, not a gate.
One safety rule matters more than the age table. Googly eyes, buttons, pom-poms and brass fasteners are small enough to choke on. The Consumer Product Safety Commission's small parts rule treats anything that fits inside its test cylinder, which approximates the fully expanded throat of a child under three, as a choking hazard on a toy made for that age, and it leaves paper out of the rule. So on a two-year-old's puppet, draw the eyes or cut them from paper, and keep the jar of googly eyes for the bigger kids.
What do you need to make a puppet?
Almost everything here comes out of the recycling bin and the craft drawer. You won't need all of it for any one puppet, so check the puppet's own list before you start.
The puppet box
- Bases: brown paper lunch bags, paper plates, craft sticks or jumbo craft sticks, wooden spoons, clean odd socks, an old glove, single-serve cereal boxes, cardboard from cereal or cracker boxes.
- Paper: printer paper, construction paper, card stock.
- To stick with: glue sticks, white school glue, clear tape, masking tape, fabric glue for felt.
- To decorate: washable markers and crayons, yarn for hair, felt and fabric scraps, paper doilies, cupcake liners.
- Tools: blunt-tip children's scissors, grown-up scissors, a hole punch, brass paper fasteners (for ages 6 and up), string or thread, a desk lamp for shadow puppets.
A glue stick dries fast enough for a toddler's attention span. White glue holds yarn and felt better but stays wet for a while, so do the gluing first and the drawing while it dries.
Puppets for ages 2 and 3
At this age a grown-up does nearly all the cutting, and the child does the parts that make it theirs: picking the animal, drawing the face, sticking on the hair. All four puppets below are big and simple, with nothing a two-year-old has to hold still for long. Make the eyes from paper or drawn marker, never googly eyes, and stay at the table for anything with glue. Expect the first puppet to be a monster whatever you planned. That counts.
1. Paper bag puppet
You need: a brown paper lunch bag, markers or crayons, paper, a glue stick.
- Lay the bag flat with the folded bottom flap facing you, on top. The flap is the puppet's head.
- Draw or glue the eyes and nose on the flap.
- Draw the top lip along the bottom edge of the flap, and the bottom lip and tongue on the bag just under it, so the mouth opens when the flap lifts.
- Glue on paper ears, yarn hair or a paper hat.
- Slide a hand in and curl the fingers into the flap. Open and close the hand to make it talk.
That folded flap exists because of Margaret Knight, who patented a machine that made flat-bottomed paper bags in 1871. Before her machine, the National Inventors Hall of Fame notes, most paper bags were V-shaped cones, and flat-bottomed ones were made by hand. Her square bottom is the mouth on every paper bag puppet since.
2. Paper plate puppet
You need: a paper plate, markers or paint, paper, tape, a glue stick.
- Fold the plate in half, eating side in, and crease it hard. The fold is the back of the mouth.
- Open it a little and color the inside red or pink for the mouth. Glue on a paper tongue.
- Color the outside, top half and bottom half, as a frog, a fish, a crocodile or anything else with a big mouth.
- Glue two paper eyes so they stand up along the top edge.
- Tape a loop of paper across the back of the top half for the fingers and another on the bottom half for the thumb.
A plate puppet opens wider than any other puppet on this list, which is why the animals with the biggest mouths suit it best. A frog that eats paper flies is a whole show for a three-year-old.
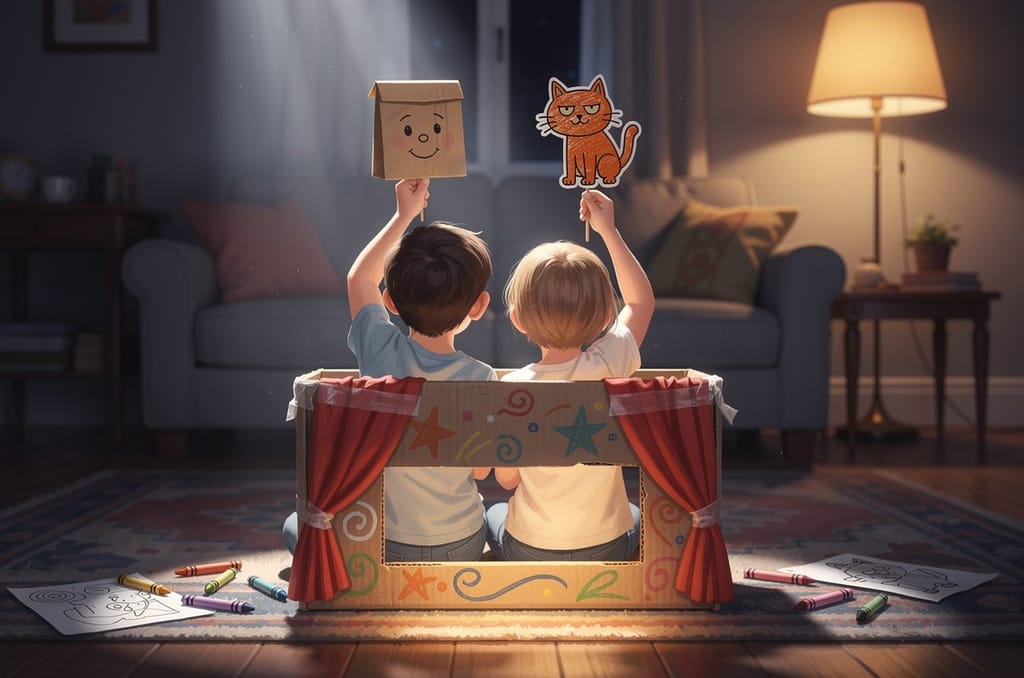
3. Stick puppet from a drawing
You need: your child's drawing on paper or card, scissors, a craft stick, tape or glue, a piece of cereal box card if the paper is thin.
- Let your child draw one character, as big as the paper allows. Anything works: a person, a cat, a car, a monster.
- If it's on thin paper, glue it onto cereal box card so it stands up straight.
- Cut round it, leaving a white border about a quarter of an inch wide. The border keeps thin lines, like legs and whiskers, from being cut off.
- Tape a craft stick to the back so a few inches stick out below.
- Hold it up behind the back of a sofa and it's on stage.
This is the puppet that turns a drawing they already made into a character, and the one to make when a child has drawn something they're proud of. Make two and the show has a hero and someone to talk to.
4. Wooden spoon puppet
You need: a wooden spoon, paper, markers, yarn, a fabric scrap, a rubber band or ribbon, glue.
- Draw a face on a paper circle a little smaller than the bowl of the spoon, and glue it to the back of the bowl.
- Glue yarn round the top edge for hair.
- Wrap a fabric scrap round the handle just under the bowl and hold it with a rubber band or a ribbon. That's the costume.
- Hold the handle and walk the spoon along the edge of a table.
Spoon puppets stand up in a jar between shows, which makes them good for a family of characters: one spoon each for everyone in the house, grandparents included. Drawing on paper and gluing it on spares the spoon, so it can go back in the kitchen drawer afterward if the puppet ever retires.
Put their drawing on a stage
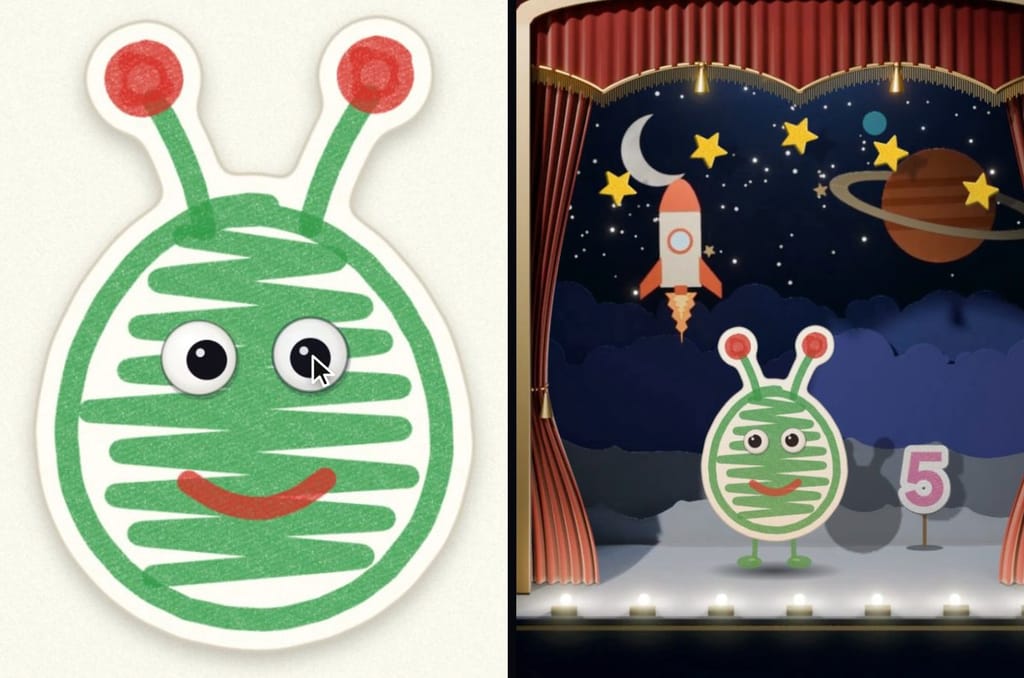
For a child too young to cut, the Curious Theatre does the scissors. Their drawing is cut out on screen as a paper puppet, gets two googly eyes and walks onto a little lit stage, and from then on every key or tap makes it do something: J jumps, S spins, A sneezes. They can draw on the screen, or you can upload a photo of a drawing on paper. The show is saved as a video on your device.
Puppets for ages 4 and 5
Four and five is when most children can cut along a line and then round a circle, so they can cut out their own characters as long as the outline is simple. Draw the outline with a thick marker so they have something to follow, and turn the paper for them on the tight corners. These puppets also start to move in a new way: mouths that open, shadows that grow and shrink. Googly eyes can join in now, with a grown-up keeping an eye on any younger siblings at the table.
5. Paper finger puppets
You need: paper or thin card, markers, scissors, tape.
- Cut a strip of paper about half an inch wide and 3 inches long.
- Roll it round your child's finger, not too tight, and tape it into a ring.
- On another piece of paper, draw a character about 2 inches tall: a person, an animal, a bug.
- Cut it out and tape or glue it to the ring.
- Make one for each finger and put on a show with one hand.
A strip and a ring is the method AccessArt uses in its finger puppet project, with a band of about 1 cm by 6 cm, a little smaller than ours. Finger puppets are the travel kind. Five of them fit in an envelope for a restaurant or a plane, and a whole cast fits on one hand.
6. Folded paper talking puppet
You need: one sheet of letter paper or construction paper, markers, glue, paper scraps.
- Fold the sheet in thirds the long way, like a letter, so you have a long strip.
- Fold the strip in half, short end to short end.
- Fold each loose end back toward the middle fold, one on each side, so it looks like the letter M from the side.
- Slide your fingers into the top pocket and your thumb into the bottom one. Pinch, and the mouth opens and shuts.
- Draw eyes on top and a tongue inside, and glue on ears or a crest.
It takes a couple of tries to get the folds, so do it alongside your child with a second sheet. KiwiCo's paper puppet uses the same folds and lists it for ages 3 to 4. It sits in this group because the folds need steadier hands than the bag or the plate, so a three-year-old will want you to fold it for them. Once the folds click, a child can make a new character in a couple of minutes, which makes this the one to reach for when a show needs a whole crowd.
7. Sock puppet
You need: a clean odd sock, paper or felt, glue, markers, yarn.
- Put your hand in the sock with your fingers in the toe and your thumb in the heel.
- Push the toe in between your fingers and thumb. That fold is the mouth.
- With your hand still in, mark where the eyes go, just above your knuckles.
- Take your hand out and glue on paper or felt eyes, a red felt tongue in the mouth and yarn hair.
- Let the glue dry before the first performance.
You don't have to cut the sock at all, which is why a four-year-old can make one with a grown-up holding it steady. For a mouth that keeps its shape, a grown-up can cut a slit across the toe and glue in an oval of card folded in half, but most sock puppets get by with the fold. Striped and patterned socks make the best characters, so the odd sock with no partner finally has a job.
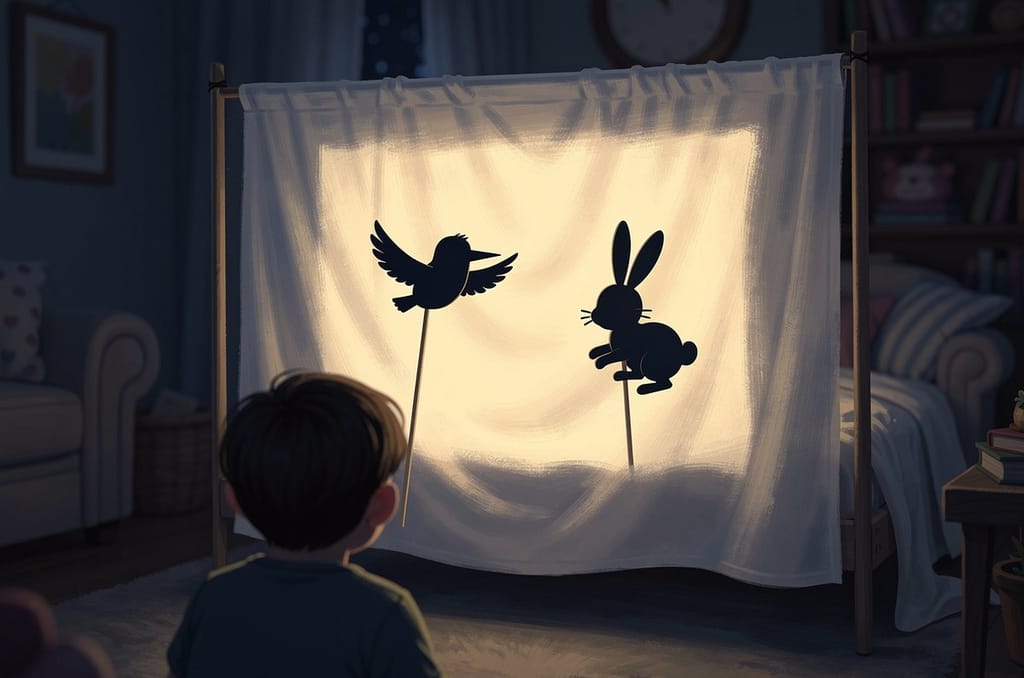
8. Shadow puppets
You need: cereal box card, a pencil, scissors, a hole punch, tape, craft sticks or straws, a white sheet and a lamp.
- Draw a side view of an animal or person on the card, big and bold. Shadows show outlines only, so give it a clear shape: ears, a tail, a beak.
- Cut it out. Punch a hole for the eye, and the light will shine through it.
- Tape a craft stick or a straw to the back.
- Hang a white sheet across a doorway or over a chair back, and put a lamp a few feet behind it.
- Stand between the lamp and the sheet and hold the puppet close to the sheet. The audience sits on the other side.
Hold the puppet flat against the sheet for a sharp shadow, and pull it back toward the lamp to make it grow and blur, which is the best trick a shadow monster has. The form is old and still performed: Chinese shadow puppetry, with leather or paper figures moved on rods behind a cloth screen lit from behind, joined UNESCO's list of the intangible cultural heritage of humanity in 2011, and Indonesia's wayang puppet theater, whose flat leather shadow puppets are moved on slender sticks, was inscribed in 2008.
Puppets for ages 6 and 7
By six or seven most children can cut out more complicated shapes, small tabs included, and keep going for half an hour. That opens up puppets with moving parts. Two of the four below use brass paper fasteners, which are a choking hazard, so pack them away before a younger brother or sister joins the table. The felt puppet needs a grown-up's hand for the sewing or the glue, but the design and the face can be all theirs.
9. Box mouth puppet
You need: a single-serve cereal box (or any small, narrow box), scissors, paper, glue, markers.
- Glue or tape the flaps at both ends of the box shut.
- Cut the box in half across one wide side and the two narrow sides, and leave the other wide side whole.
- Fold the two halves back against each other, bending the uncut side. The two closed ends of the box now sit one above the other: that's the face, and the cut openings are at the back.
- Slide your fingers into the top half and your thumb into the bottom half through the openings at the back. Open your hand and the mouth opens at the front.
- Draw a face on paper, cut it along the mouth line, and glue the top part to the top half and the bottom part to the bottom half. Add eyes, teeth and a tongue.
A grown-up should start the cuts, since cardboard is tough for small scissors, and a child of six can finish them. The box gives the jaw a hard edge, so this is the puppet for a snapping crocodile, a shark or a dragon. Paper teeth glued along the edges of the mouth make it.
10. Jointed paper puppet
You need: card, a pencil, scissors, a hole punch or a sharp pencil, brass paper fasteners, tape, two craft sticks.
- Draw the parts separately: a head, a body, two arms and two legs. Give each arm and leg a round end where it joins the body.
- Cut them all out.
- Lay each limb's round end over the body and make a hole through both layers. A hole punch only reaches the edges, so for the rest push a pencil point through, with a ball of play dough underneath.
- Push a brass fastener through each pair of holes and open its legs flat at the back. Don't press them tight, or the joint won't swing.
- Tape one stick to the back of the body and the other to one hand.
Hold the body still and move the hand stick, and the arm waves. A first paper puppet needs five joints: the head, two arms and two legs. The carved figures of Chinese shadow puppetry can have between 12 and 24 moveable joints, UNESCO notes, so add elbows and knees once the first one works. A jointed puppet also makes a good shadow puppet: hold it up in front of the lamp.
11. Jumping jack
You need: card, scissors, a hole punch, brass paper fasteners, thread or thin string, a bead or button for the end of the pull string.
- Draw a body and four limbs. Give each limb a rounded top end that reaches about half an inch past where the joint will go. Cut them out.
- Join the limbs to the body with brass fasteners, loose enough to swing, as in the jointed puppet.
- In each limb's rounded top end, above the fastener, punch or poke a small second hole.
- Tie a thread across the back from one arm's small hole to the other's, then do the same for the legs. Keep both threads slack when the limbs hang down.
- Tie a long pull string to the middle of the arm thread, run it down to the leg thread and tie it there too, and let the rest hang below with a bead on the end. Pull it, and the arms and legs fly up.
It takes fiddling to get the threads the right length, so it's a good one to make with a seven-year-old rather than for them. The toy has a past. In France, where it was called a pantin, there was a fashion in 1747 for carrying jumping jacks everywhere, the World Encyclopedia of Puppetry Arts records, with adults pulling them out of their pockets at court and in the theater.
12. Felt hand puppet
You need: two pieces of felt, a marker, fabric scissors, fabric glue or a plastic needle and yarn, felt scraps for the face.
- Lay your child's hand flat on paper with the thumb and little finger spread out and the middle fingers together. Trace round it.
- Draw a smooth outline about an inch outside the tracing, like a mitten with a thumb on each side, and cut that out as the pattern.
- Pin the pattern to two layers of felt and cut both pieces at once.
- Glue or sew round the edges, leaving the bottom open. A running stitch with a plastic needle is a good first sewing job for a six-year-old.
- Let the glue dry fully, then add a felt face, ears and hair.
The thumb and little finger become the arms, and the middle fingers hold up the head, which is how a glove puppet clasps its hands and waves. Of everything here, this is the one that lasts for years and goes in the toy box rather than the recycling.
How do you make a puppet theater?
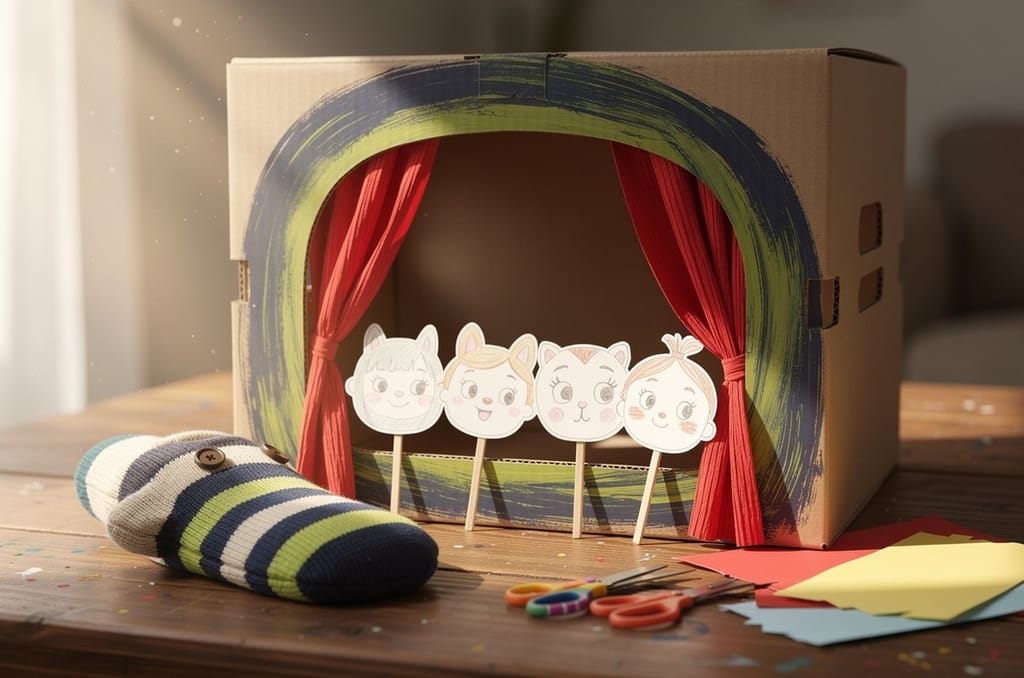
The quickest puppet theater is a doorway with a sheet across it, and the nicest is a cardboard box with a painted arch. Pick by how much time you have.
| Stage | What you need | Best for | Setup |
|---|---|---|---|
| Doorway | A tension rod and a sheet or tablecloth | Hand, sock and bag puppets; several puppeteers | 5 minutes |
| Table on its side or the back of a sofa | Nothing | Any puppet, right now | 1 minute |
| Cardboard box | A big box, a box cutter (grown-up), paint, crepe or tissue paper | Stick, finger and jointed puppets | An afternoon |
| Shadow screen | A sheet or a box window covered in parchment paper, and a lamp | Shadow and jointed puppets | 10 minutes |
Setup times are our own rough guides. The box theater method follows Puppet Showplace Theater's.
For a doorway stage, set the tension rod at about the height of your child's shoulders when they kneel, so they can hide behind the sheet with their arms up. For the box, Puppet Showplace Theater in Brookline, Massachusetts, cuts a big window in the front for the stage, a slot along the top for puppets lowered from above, and slots in the sides for puppets that enter from the wings, then tapes crepe paper inside for curtains.
A box theater is also very old. The toy theaters of 19th-century London were sold as printed sheets of scenery and characters to color, cut out and glue onto card, at a penny plain or twopence colored. The World Encyclopedia of Puppetry Arts dates the beginning to a build-your-own theater front published in London in 1812, and notes that the finished theaters were rarely more than 50 or 60 centimeters, about 20 to 24 inches, which is the size of a big cardboard box.
What are good puppet show ideas?
A good puppet show for young kids is short: a puppet, a problem, three tries to fix it and a bow. Done in a few minutes, it ends while the audience still wants more, and the puppeteer gets to do it again. Here are 12 ideas that work with any of the puppets above.
- The hiccups. A puppet can't stop hiccupping and asks the audience for cures. The last one works.
- Where's my hat? A puppet hunts for a hat that is sitting on its head. The audience shouts.
- The sneeze that won't come. Ah, ah, ah... nothing. Three times. Then a huge one that knocks over the other puppet.
- The weather report. A puppet forecasts silly weather: raining socks, a chance of pancakes.
- The restaurant. One puppet is the waiter and takes the most ridiculous order it has ever heard.
- The checkup. A puppet visits the doctor and is a bit scared. Good before a real appointment.
- The race. A fast puppet and a slow one, and the fast one stops for a snack.
- Bedtime. A puppet who will not go to sleep, and keeps finding one more thing to do.
- The joke show. Two puppets trade jokes. Borrow them from our jokes for kids, sorted by age.
- The grumpy day. A puppet wakes up grumpy and the others try to cheer it up. The fix is a hug, or a snack.
- The talent show. Each puppet does one trick, a song, a spin or a joke, and everyone bows together.
- A story they know. Retell a fairy tale with three of something: three pigs, three bears, three billy goats.
Let the youngest puppeteers make it up as they go, and give older ones a paper with the beginning, middle and end written on it, taped inside the stage where the audience can't see.
Why are puppets good for kids?
Puppets get children talking, and there is research behind that. In a randomized controlled trial with 94 three- and four-year-olds, Lake and Evangelou (2019) of the University of Oxford ran ten weeks of twice-weekly sessions: a storybook read with a puppet, then the children planned and acted out a pretend-play version of the story. Compared with the control group, the children showed significant gains in the words they understood and the words they used, and their average utterances got longer.
Older children respond too. In a study of 16 teachers of 7- to 11-year-olds in London and Manchester, Simon and colleagues (2008) found that when teachers brought large puppets into science lessons, more of their talk went on reasoning and argument and less on simple recall, and interviews with teachers and children pointed to a lift in the children's motivation. And in a 2024 survey of 121 early years educators by Timmins and King, 65% of those who used puppets said children's engagement with learning improved, rising to 92% among frequent users. Making the puppet first gives a child a character they already care about before the show starts.
What do you do with the puppets after the show?
Keep the favorites flat in a folder or a big envelope, and photograph the rest before they go in the recycling. Paper puppets crease and paper bags tear, so a photo with the puppeteer holding it up is often the version that lasts. Write the puppet's name and your child's age on the back of the envelope.
The drawing behind a stick puppet can have a second life, too. Upload a photo of it to the Curious Theatre and it becomes a paper puppet on a lit stage, where your child plays it with the keyboard or with taps and the show is saved as a video. If one character becomes the family favorite, the same drawing can be stitched in thread on a sweatshirt, hoodie, tee or tote, from $45, or kept on a necklace, from $59. And if they want to draw a new cast first, our easy Christmas drawings for kids are sorted by the same scissor-and-crayon ages as this page.
Frequently asked questions
What is the easiest puppet to make?
+
A paper bag puppet. You need a brown paper lunch bag and a marker: the folded bottom flap is the head, the mouth goes along the edge of the flap, and a hand inside makes it talk. A stick puppet is just as quick: cut out a drawing, leave a small white border, and tape it to a craft stick.
What age can a child make a puppet?
+
From about two, with a grown-up doing the cutting while the child draws the face and glues on the hair. Most children snip with scissors at 2, cut along a line at 3 to 3.5 and cut out a circle at 3.5 to 4, so from four they can cut out simple puppets themselves. By six or seven they can make jointed puppets with moving arms and legs.
How do you make a paper puppet that talks?
+
Fold a sheet of paper in thirds the long way, fold the strip in half, then fold each loose end back toward the middle fold so it makes an M from the side. Put your fingers in the top pocket and your thumb in the bottom one, and pinch to open and shut the mouth. A paper bag and a paper plate folded in half talk the same way.
What do you need to make a puppet?
+
A base, something to stick with and something to draw with. The base can be a paper bag, a paper plate, a craft stick, a wooden spoon, an odd sock or card from a cereal box. Glue sticks and tape hold most of it, and markers, yarn and paper scraps make the face. For children under three, draw the eyes instead of using googly eyes, which are small enough to choke on.
How do you make a puppet stage at home?
+
Hang a sheet on a tension rod across a doorway at about the height of a kneeling child's shoulders, or turn a table on its side. For a tabletop theater, cut a big window in the front of a cardboard box, slots in the sides for puppets to enter from the wings, and tape crepe paper inside for curtains. For shadow puppets, hang a white sheet with a lamp a few feet behind it.
Can my child's drawing become a puppet?
+
Yes. Cut it out with a small white border, glue it to card and tape it to a craft stick. Or open the Curious Theatre, which is free: your child draws on the screen, or you upload a photo of the drawing, and it is cut out as a paper puppet with googly eyes on a little lit stage, where every key or tap makes it do something. Nothing is uploaded, and the show is saved as a video on your device.